Configuring a PBX
Overview
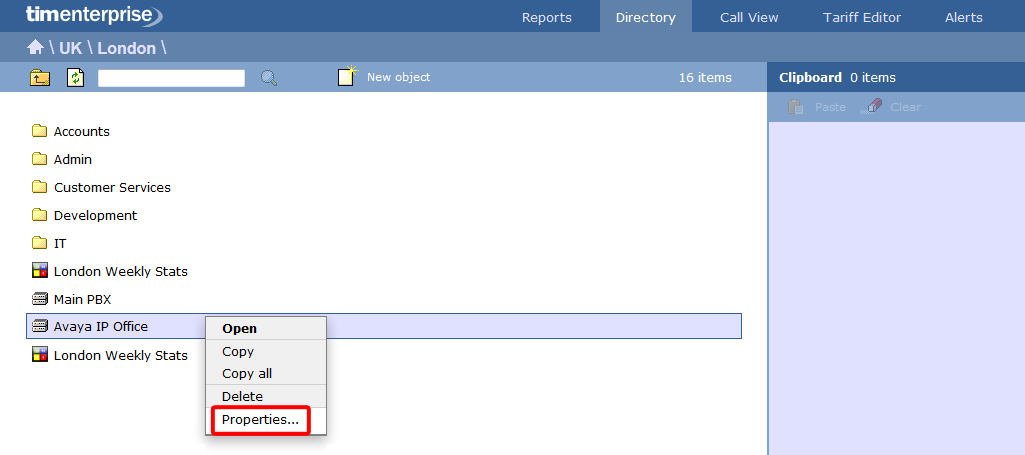
To configure a PBX, locate the object in the Directory, click on it and select Properties from the drop-down list, as shown below:
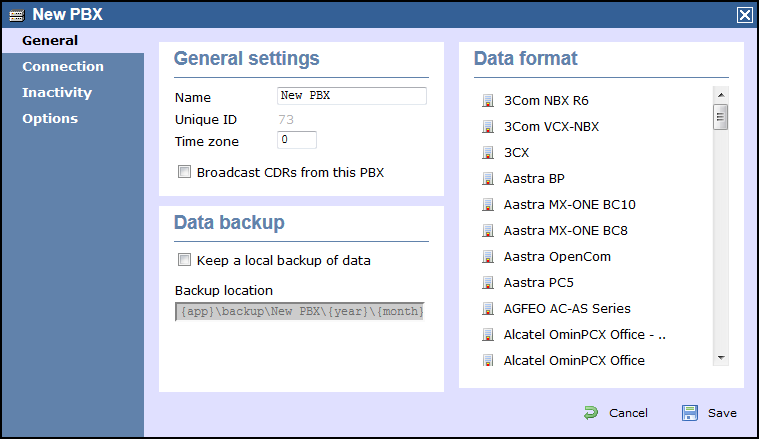
A new window will open, allowing you to configure the properties of your PBX object, as shown below:
General
This tab allows you configure the general properties of your PBX object, which are described in the table below:
| Field | Description |
|---|---|
| Name | The name by which you want your PBX to be identified. Usually, the make or model name of your PBX is used |
| Unique ID | The unique ID of the PBX object |
| Time zone | This feature is no longer in use |
| Broadcast CDRs from this PBX | This feature is no longer in use |
| Data format | Each telephone system outputs its call logging data in a different format. Select your PBX model from the list provided to ensure your calls are logging correctly. |
Keep a local backup of data - Tick this box to backup your call logging data and enter the location of the folder you want to store these files The default path is {app}\backup\backup-{year}-{month}-{day}.{uiv} and can contain dynamic variables, as detailed below:
| Item | Description |
|---|---|
app | The full installation path of TIM Enterprise |
year | The year the data was captured, in yyyy format |
month | The month the data was captured, in mm format |
day | The day of the month when data was captured, in dd format |
uiv | The unique ID representing each site in the Directory |
Connection
This tab allows you to configure the connection parameters of your telephone system. The properties presented in the Connection details section will vary, depending on the connection method used by your telephone system to provide call logging data. Each type of connection is described below:
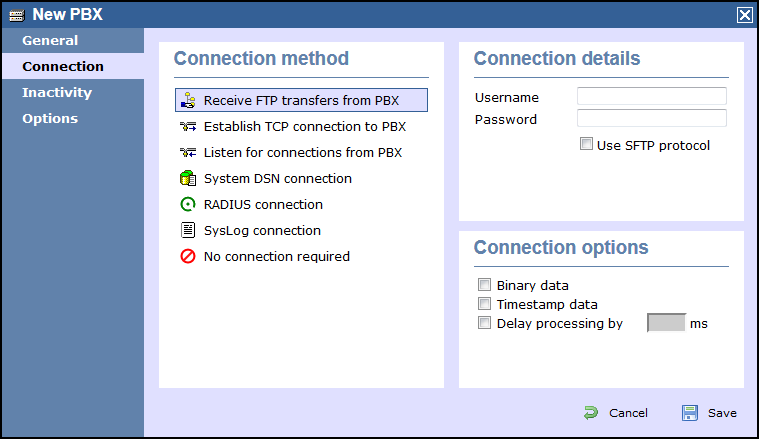
Receive FTP transfers from PBX
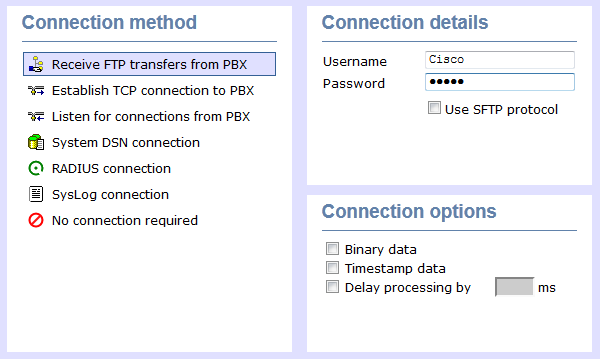
| Field | Description |
|---|---|
| Username | The username of the FTP account on your telephone system. |
| Password | The password of the FTP account on your telephone system. |
| Use SFTP Protocol | Select this option if you are using SFTP. |
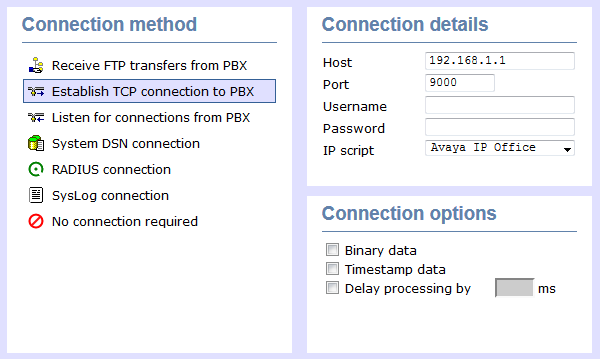
Establish TCP connection to this PBX
| Field | Description |
|---|---|
| Host | The IP address of the telephone system. |
| Port | The port number that your telephone system listens on. |
| Username | The username required to log in to your telephone system, if applicable. |
| Password | The password required to log in to your telephone system, if applicable. |
| IP script | The script file that TIM Enterprise uses when checking for new data. |
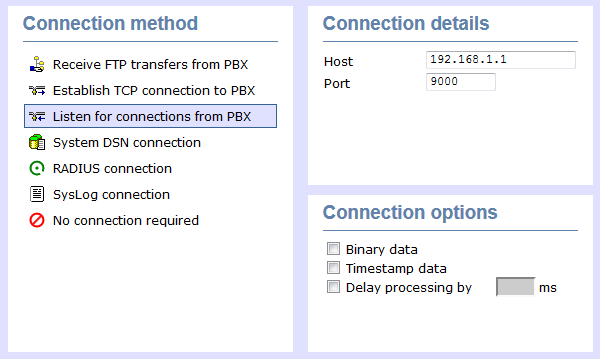
Listen for connection to this PBX
| Field | Description |
|---|---|
| Host | Specify the IP address of your PBX to only allow data to be sent from that address. You may leave this field blank to accept data from any IP address. |
| Port | The port number that TIM Enterprise should listen on for call logging data. |
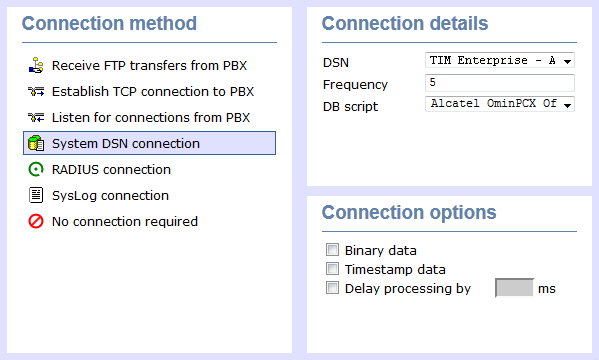
System DSN connection
| Field | Description |
|---|---|
| DSN name | The name of the system DSN connection to use when connecting to your telephone system's database. |
| Frequency | The frequency, in seconds, of the checks that TIM Enterprise makes when connecting to the database to determine if new data is available. |
| DB Script | The database script that TIM Enterprise uses when checking for new data. |
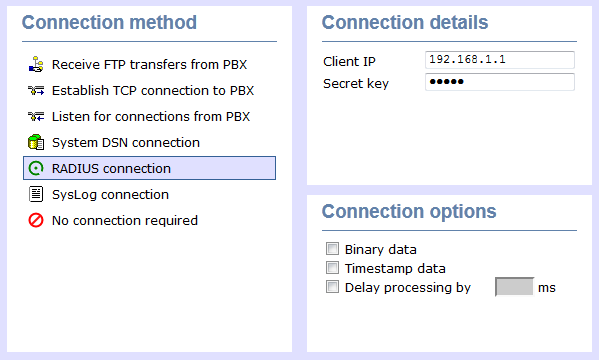
RADIUS connection
| Field | Description |
|---|---|
| Client IP | The IP address of your telephone system responsible for sending RADIUS packets. |
| Secret | The secret key used in RADIUS authentication between TIM Enterprise and your telephone system. |
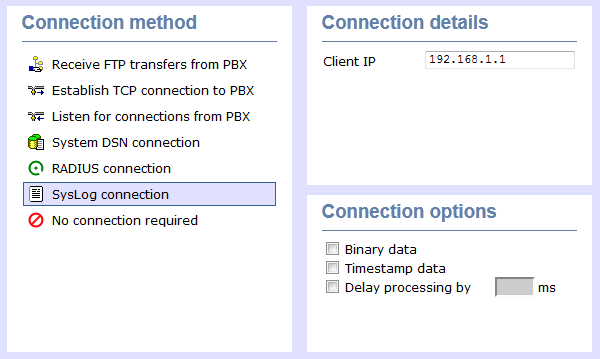
Syslog connection
| Field | Description |
|---|---|
| Client IP | The IP address of your telephone system responsible for sending SysLog events to TIM Enterprise. |
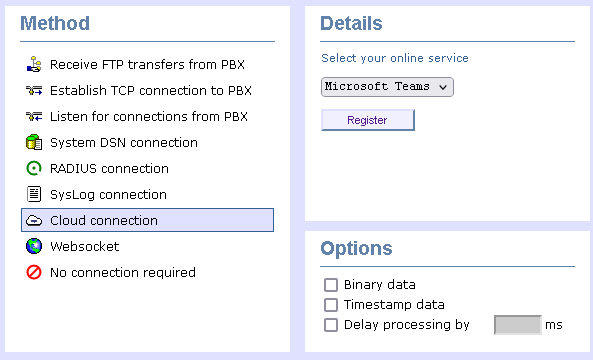
Cloud connection
| Field | Description |
|---|---|
| PBX Selector | The type of Cloud connector you want to connect to TIM Enterprise. |
| Register | Register your Cloud service with TIM Enterprise. |
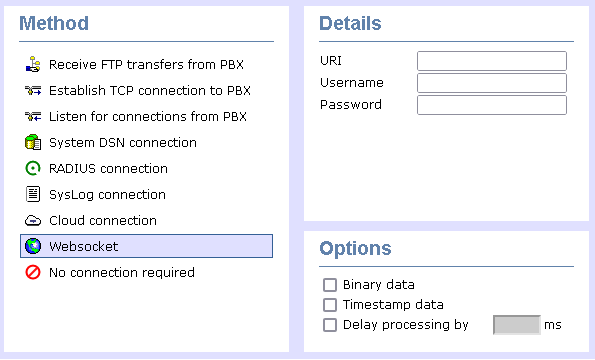
Websocket
| Field | Description |
|---|---|
| URI | Enter the URI of your websocket connection. |
| Username | Enter the Username of your websocket connection. |
| Password | Enter the Password of your websocket connection. |
info
For detailed information about connecting to all makes/models of PBX, refer to the Connecting to your PBX section.
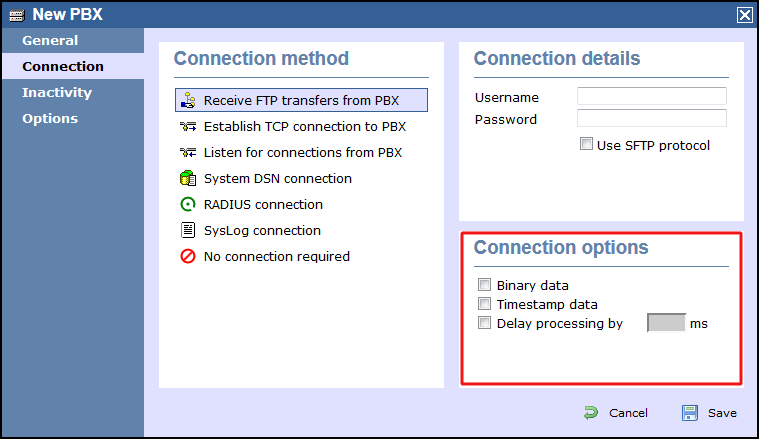
Connection options
| Option | Description |
|---|---|
| Binary data | Select this option if your telephone system sends call records in a non-textual format. |
| Timestamp data | TIM Enterprise can timestamp call records from your telephone system as they are received, if they do not already include dates and times. |
| Delay processing by | Enable this option and enter a time delay, in milliseconds, if call records are sent from your telephone system over a slow connection. This helps to prevent data loss when call records are processed before they are fully received. |
Inactivity
This tab allows you to set up an inactivity timer, which can notify you by e-mail when TIM Enterprise has not received data from your telephone system for a given amount of time.
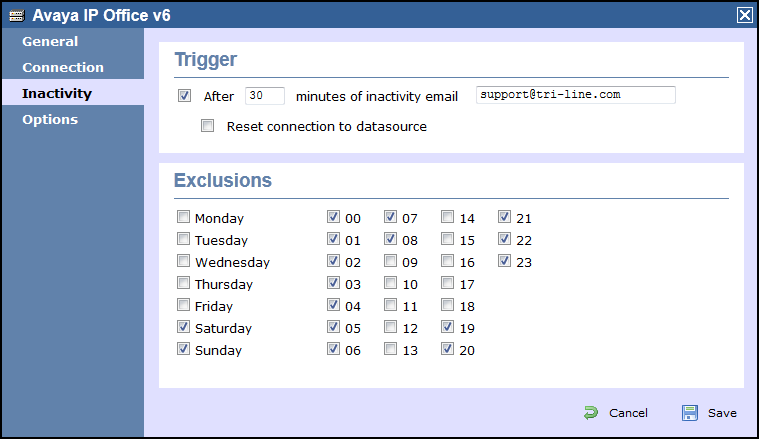
Enable inactivity timer
Select this option to enable inactivity monitoring for the site you are configuring. Enter the amount of time, in minutes, that must pass with no call activity, before action is taken. You have the option to be notified of these events by email by entering an email address into the text box provided. SMTP settings will need to be setup in TIM Enterprise to be able to be notified via email.
Reset connection on inactivity
TIM Enterprise can reset the network connection to your telephone system when there is no network activity to/from the phone system. You have the option to be notified of these events by email by entering an email address into the text box provided. SMTP settings will need to be setup in TIM Enterprise to be able to be notified via email.
Exclude days and hours from inactivity monitoring
Tick the box alongside the days and hours when it is expected for there to be no call activity taking place, such as at night or at weekends, so as not to receive unnecessary e-mail notifications for those periods.
Options
The Options tab allows you to restrict the lookup of users outside the selected PBX object. This will allow you to log users with the same extension number across different sites.
info
This option is turned off by default and it is recommended that you check with our Technical Support team whether it needs to be enabled on our system.